
THE RIBBON CONSISTS OF FOLLOWING TABS :
1.. HOME TAB
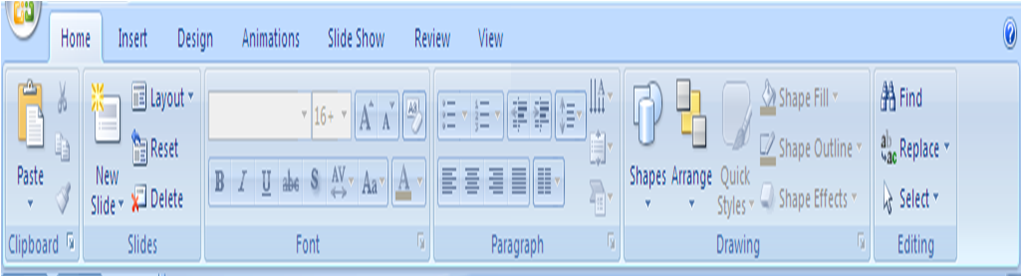
This TAB contains :
1. THE CLIPBOARD GROUP
It contains commands for working with text editing such as Cut, Copy and Paste.
Here, user will also find the Format Painter command which copies formatting rather than actual text or data.
This group contains a Dialog Box Launcher arrow in the lower-right corner that opens the Clipboard task pane when clicked.
2. THE SLIDES GROUP
This on the Home tab contains commands for inserting new slides into your presentation.
Additionally, this group contains commands for adjusting the slide layout and deleting slides.
3. THE FONT GROUP
It contains all the commands related to font formatting- Bold, Italic, & Underline as well as the font face (Times New Roman , Arial etc ) and font size.
Commands like Shadow, Font Color and Clear Formatting are also contained in this group.
This group contains a Dialog Box Launcher arrow in the lower-right corner that opens the Font dialog box when clicked.
4. THE PARAGRAPH GROUP
This on the Home tab is where user go to set whether they want their data to appear at the left, center or right edge of a text placeholder and where they can increase or decrease the left and right indent levels.
This group contains a Dialog Box Launcher arrow in the lower-right corner that opens the Paragraph dialog box when clicked.
5. THE DRAWING GROUP
This contains commands for creating and editing drawing shapes.
This group contains a Dialog Box Launcher arrow in the lower-right corner that opens the Format Shape dialog box when clicked.
6. THE EDITING GROUP
This is the last one on the Home tab and contains commands for finding and replacing data as well as selecting text.


FORMATTING TABLES-
The Table Tools: Design Ribbon allows user to :

The Table Tools: Layout Ribbon, allows user to:


Clip Art: Choose from artwork already made and available.
Photo Album: This creates instant photo slideshows. Just add images from computer and they will be applied to slides.
Shapes: Add any of more than 100 Pre-made shapes.

SmartArt: A feature which allows quick construction of charts and nice-looking graphics with text.
When user create a SmartArt graphic, they are prompted to choose a type of SmartArt graphic, such as Process, Hierarchy, Cycle, or Relationship.
Each type of SmartArt graphics contains several different layouts. After you choose a layout, it is easy to switch the layout or type of a SmartArt graphic.
Most of the text and other content, colors, styles, effects, and text formatting are automatically carried over to the new layout.

3.THE LINKS GROUP
In PowerPoint, a hyperlink can be a connection from one slide to another slide in the same presentation (such as a hyperlink to a custom show) or to a slide in another presentation, an e-mail address, a Web page, or a file.
User can create a hyperlink from text or from an object, such as a picture, graph, shape, or WordArt.
4. THE TEXT GROUP
It provides user to insert -
5. THE MEDIA CLIPS Group
MOVIE-
Movie types include MPEG/MPG, AVI, and WMV files.
Flash movies (.swf) and Apple QuickTime movies (.mov) might not play; test them in WMP first to find out.
Some movie files with codecs like AVI might not play because they need a special "codec," or video-encoding software, in order to play it on your computer.
When user have a movie on the slide, they can also use the Movie Tools: Options ribbon.
SOUND-
User can also add sounds to the presentation.
Sound types include WAV, WMA, AIF, MID, and MP3.
Other sound files, such as MP4 and AAC, might not work. Again, if it plays in WMP, then it will play in PowerPoint.
NOTE: Although PowerPoint can play all of these sound file types independently, only WAV files can be used as animation sound effects.
User can specify that the sound plays across slides. This allows user to use a music file as background music for the slide show.


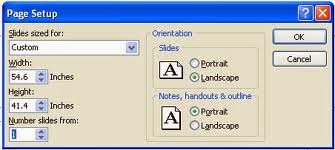
1. THE PAGE SETUP Group
Page setup is used to customize the slide size to that of a paper size, width, number of slides to be printed. It also defines how to print the notes, handouts and slides.
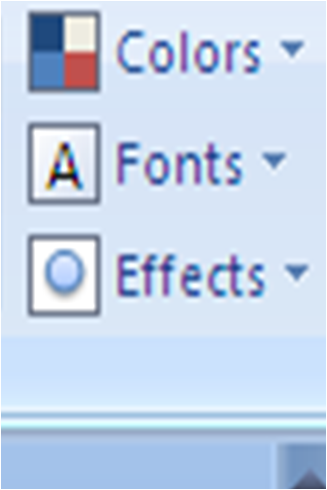
2. THE THEMES Group
Themes are an easy way to design a whole slide show. Every slide in the presentation will change to match the background, font, colors, and effects chosen for each theme.
The good point about themes is that they are easy and quick and make your presentation look nice.
2.. INSERT TAB
1.THE TABLES GROUP
This command on the Insert tab is there specifically to help user insert tables into your PowerPoint slides.
User can select the number of columns and rows by dragging the mouse over the grid.
While user drag the mouse, the table dynamically draws itself in the slide, giving you a preview of what the table will look like when user decide on a size.
User can resize the table by clicking and dragging on an area marked by three or four dots. In areas of the frame that are clear, clicking and dragging will move the table around.
FORMATTING TABLES-
The Table Tools: Design Ribbon allows user to :
- Turn on/off rows and columns as special label/totals areas;
- Choose a design for the table from a set of templates;
- Set the shading, borders, and special effects for the cells;
- Set the Word Art style (if you wish to use Word Art in the table); and
- Draw special borders.
The Table Tools: Layout Ribbon, allows user to:
- Turn grid lines on or off (in some tables);
- Delete the chart;
- Add rows and columns;
- Merge/split cells;
- Change the size of rows/columns;
- Change the alignment and margins in cells;
- Change the table size;
- Arrange the table on the slide.
2. THE ILLUSTRATIONS GROUP
Here user will find commands for all sorts of graphics including pictures, ClipArt, Shapes and Charts.
Picture: Add a photograph to your slide; choose any image file on your computer.
This ribbon allows user to affect images in many ways:
- Change the appearance of an image;
- Choose a picture frame;
- Choose a shape, border, or special effect for the image;
- Arrange or group the image relative to other images;
- Crop the image.
Clip Art: Choose from artwork already made and available.
Photo Album: This creates instant photo slideshows. Just add images from computer and they will be applied to slides.
Shapes: Add any of more than 100 Pre-made shapes.
SmartArt: A feature which allows quick construction of charts and nice-looking graphics with text.
When user create a SmartArt graphic, they are prompted to choose a type of SmartArt graphic, such as Process, Hierarchy, Cycle, or Relationship.
Each type of SmartArt graphics contains several different layouts. After you choose a layout, it is easy to switch the layout or type of a SmartArt graphic.
Most of the text and other content, colors, styles, effects, and text formatting are automatically carried over to the new layout.
Charts:
1. User can create a chart or graph in Presentation.
When this option is selected a new chart in PowerPoint is created, and data is edited for that chart in Office Excel 2007, but saved with the PowerPoint file.
2. User can paste an Excel chart or graph into the presentation and link to the data in an Office Excel 2007 file.
When user copy a chart from a saved Office Excel 2007 file and paste it into the presentation, the data in the chart is linked to that Excel file.
If user want to change the data in the chart, they must make changes to the linked worksheet in Office Excel 2007 and then refresh the data in the PowerPoint presentation.
The Excel worksheet is a separate file and is not saved with the PowerPoint file.
Insert a chart or graph in your presentation
To create a new chart or graph in PowerPoint:- In PowerPoint, click the placeholder that want to contain the chart.
- On the Insert tab, in the Illustrations group, click Chart.
- In the Insert Chart dialog box, click a chart, and then click OK.
Office Excel 2007 opens in a split window and displays sample data on a worksheet.
 Sample data on an Excel worksheet
 - In Excel, to replace the sample data, click a cell on the worksheet, and then type the data that you want.
User can also replace the sample axis labels in Column A and the legend entry name in Row 1.
- When user are finished inputting the data in Excel, on the File menu, click Close.
3.THE LINKS GROUP
In PowerPoint, a hyperlink can be a connection from one slide to another slide in the same presentation (such as a hyperlink to a custom show) or to a slide in another presentation, an e-mail address, a Web page, or a file.
User can create a hyperlink from text or from an object, such as a picture, graph, shape, or WordArt.
User can Create a hyperlink to:
- A slide in the same presentation.
- A slide in a different presentation.
- An e-mail address.
- A page or file on the Web.
- A new file.
4. THE TEXT GROUP
It provides user to insert -
- Text Box: Create a box with text that can be resized and placed anywhere on the slide.
- Header and Footer: Add information (slide numbers, date/time, titles, etc.) to the top and bottom of any or all slides.
- Word Art: Create styled, 3-D art using text.
- Date & Time: Adds date and or time stamps to the Header or Footer.
- Slide Number: Adds slide numbers to the Header or Footer.
- Symbol: To add a symbol that you can't type using the keyboard.
- Object: Add special objects to the slide.
5. THE MEDIA CLIPS Group
MOVIE-
Movie types include MPEG/MPG, AVI, and WMV files.
Flash movies (.swf) and Apple QuickTime movies (.mov) might not play; test them in WMP first to find out.
Some movie files with codecs like AVI might not play because they need a special "codec," or video-encoding software, in order to play it on your computer.
When user have a movie on the slide, they can also use the Movie Tools: Options ribbon.
To insert a movie file:
- On the Insert tab in the Media Clips group, click Movie, and then click Movie from File.
- Locate the file using the Insert Movie dialog box.
- Choose when you want the movie file to play:
- Automatically. The movie plays automatically when you show the slide.
- When Clicked. The movie plays during the presentation when you click the icon.
- Move or resize the movie thumbnail just as you would a picture.
- Select the icon, and click the Movie Tools Options tab for more options.
To insert a movie (an animated picture) from Clip Organizer:
- On the Insert tab in the Media Clips group, click Movie, and then click Movie from Clip Organizer.
- Scroll through the list, or type keywords in Search for, and then click Go.
- To preview a clip, point to a thumbnail, and click the arrow that appears. Then, click Preview/Properties.
- To insert the movie into the slide, click the thumbnail.
- Drag the image or use the resize handles on the border to move or resize it.
- Run the slide show to see how the movie looks.
SOUND-
User can also add sounds to the presentation.
Sound types include WAV, WMA, AIF, MID, and MP3.
Other sound files, such as MP4 and AAC, might not work. Again, if it plays in WMP, then it will play in PowerPoint.
NOTE: Although PowerPoint can play all of these sound file types independently, only WAV files can be used as animation sound effects.
User can specify that the sound plays across slides. This allows user to use a music file as background music for the slide show.
To insert a sound (.wav or .mid file) from Clip Organizer:

- On the Insert tab in the Media Clips group, click Sound, and then click Sound from Clip Organizer.
- Scroll through the list, or type keywords in Search for, and then click Go.
- To preview a sound, point to a clip and click the arrow that appears. Then, click Preview/Properties.
- To insert the sound into the slide, click the thumbnail.
- Choose when you want the sound to play:
- Automatically. The sound plays automatically when you show the slide.
- When Clicked. The sound plays during the presentation when you click the sound icon.
- Move or resize the sound icon just as you would a picture.
- Select the icon, and click the Sound Tools Options tab for more options.
For example, if the sound runs automatically, user can click Hide During Show in the Sound Options group to hide the icon.
Click Slide Show Volume, to lower the volume of the sound to play in the background.
To record your voice and add it to a slide:
To record your voice, you need to have a microphone connected to your computer.
- On the Insert tab in the Media Clips group, click Record Sound.
- Type a name for the recording, or use the default name.
- To begin, click the Record button.
- When you are finished, click the Stop button.
- To listen to the recording, click the Play button. Click the Record button again to add more sound to the recording, or click Cancel to start over at step 1. If you like the recording, click OK.
- A sound icon appears on your slide. You can move or resize the sound icon just as you would a picture. Select the icon, and click the Sound Tools Options tab for more options. While working on your presentation, you can hear the recording at any time by double-clicking the sound icon.
3.. DESIGN TAB
1. THE PAGE SETUP Group
Page setup is used to customize the slide size to that of a paper size, width, number of slides to be printed. It also defines how to print the notes, handouts and slides.
2. THE THEMES Group
Themes are an easy way to design a whole slide show. Every slide in the presentation will change to match the background, font, colors, and effects chosen for each theme.
The good point about themes is that they are easy and quick and make your presentation look nice.
THE THEMES CAN BE FORMATTED BY the commands on right of it -
3. THE BACKGROUND Group
Clicking on "Background styles" lets you choose quickly from the styles below:
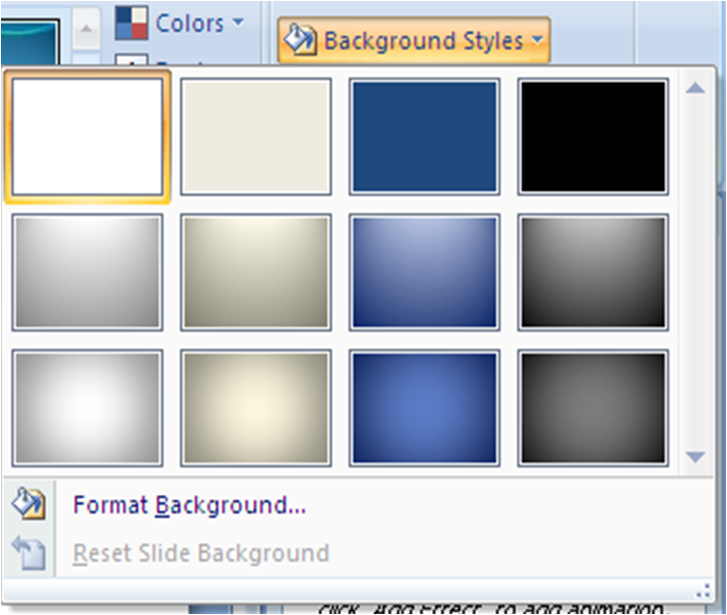
If you click on "Format Background," you can choose far more detail about the slide background.
4.. ANIMATIONS TAB
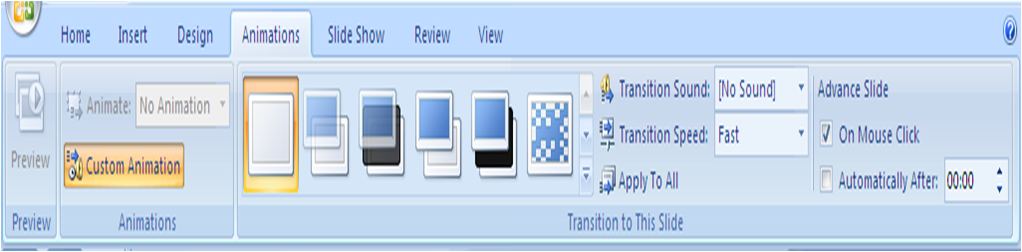
1. THE PREVIEW GROUP
The Animations tab begins with a "Preview" button. This will show a preview of the animation or transition that you made--but you have to make one first!
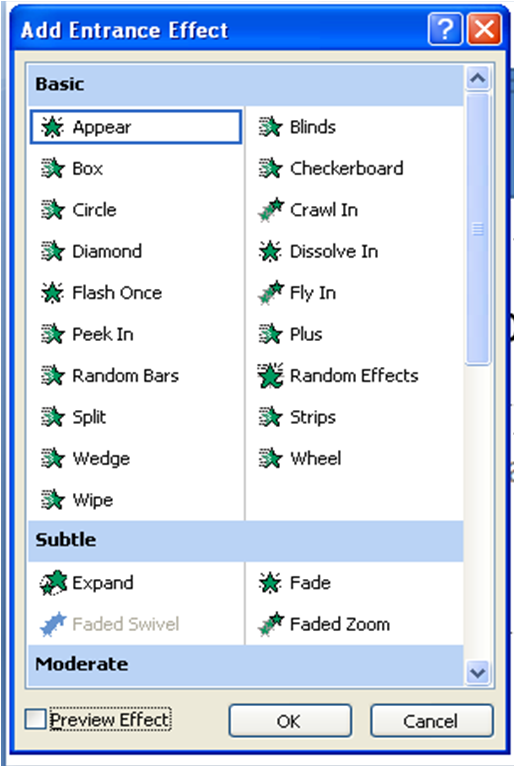
2. THE ANIMATIONS GROUP
User can make just about any object move in and out and fly around and gesture in almost any way you can imagine.
User can make just about any object move in and out and fly around and gesture in almost any way you can imagine.
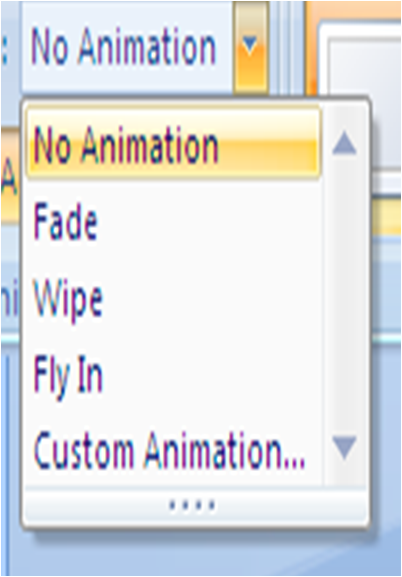
In the panel shown above, there are two actions. The one on top is a very limited set of animations, in case of doing a very simple animation and you want to do it quickly.
"Custom Animation" button will reveal the Custom Animation task pane. With this, user can create many forms of animations.
TWO OPTIONS OF ANIMATIONS -
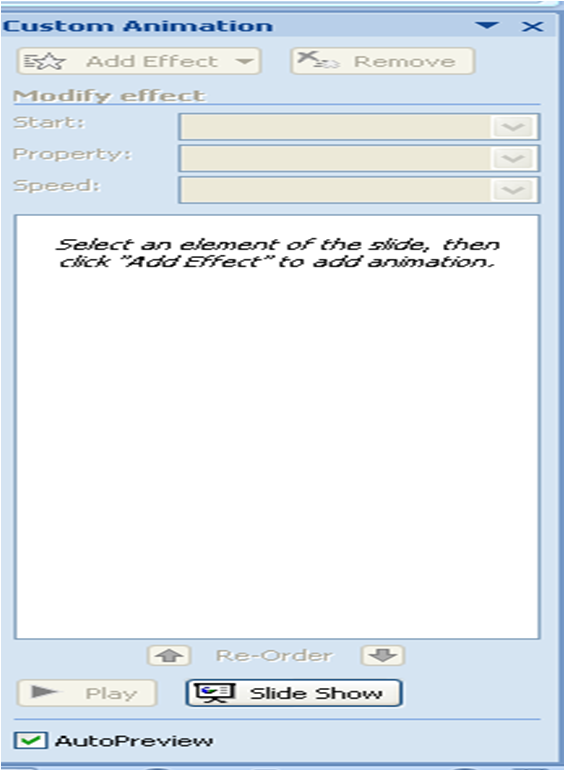
THE CUSTOM ANIMATION COMMAND OPTIONS -
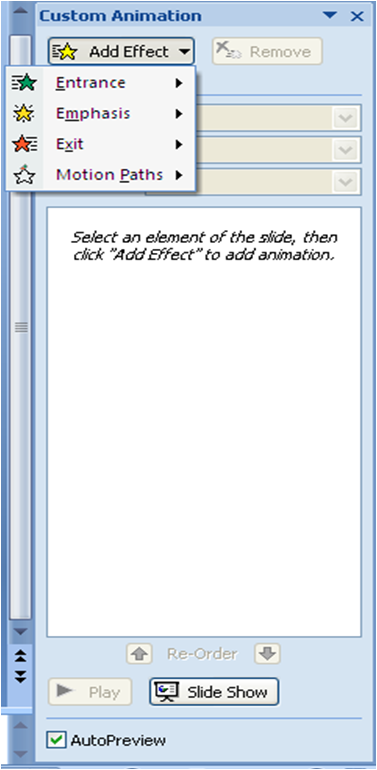
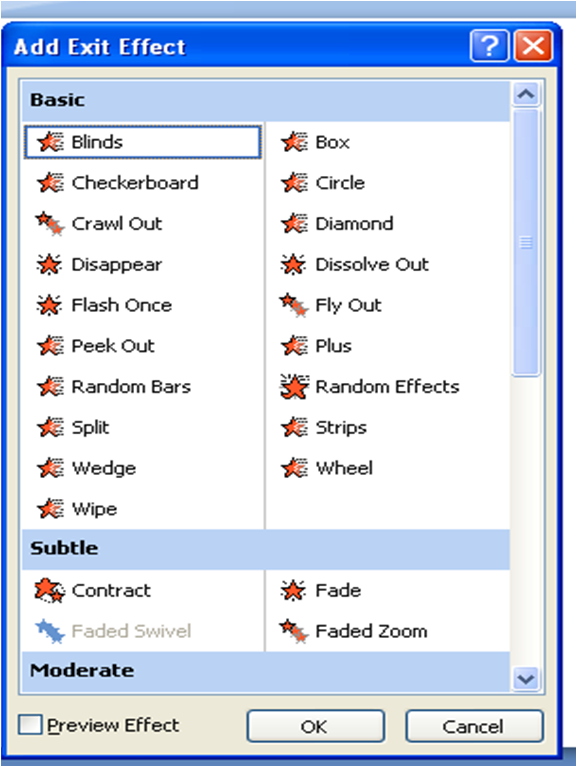
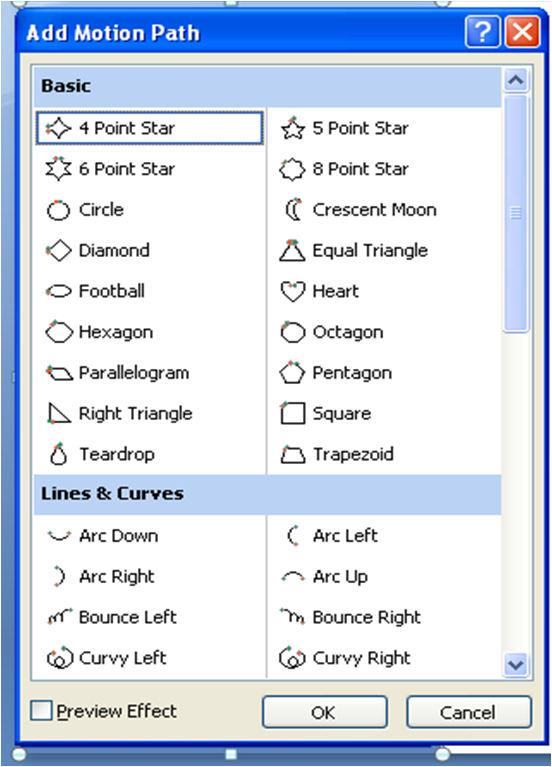
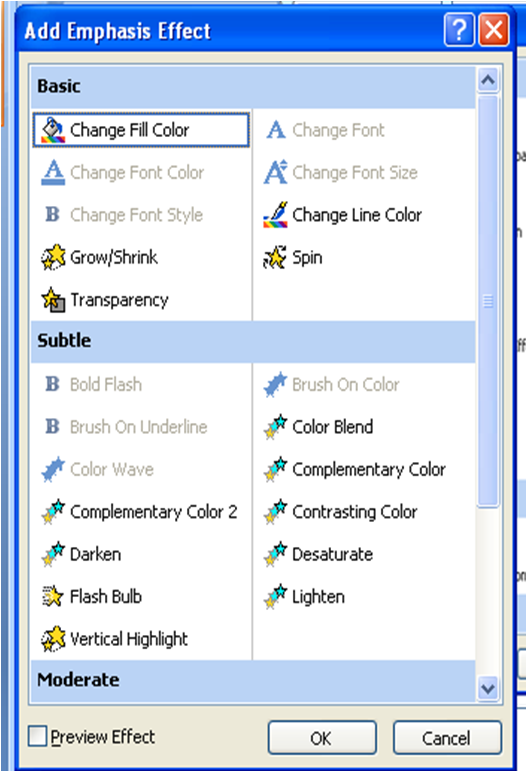
USER CAN-
- Set the start time for an animation effect.
- Delay the start of an animation effect.
- Repeat or rewind an animation effect.
- Reorder animation effects.
The "Modify" Menus"Modify" menus, "Start," Direction," and "Speed." (Note that "Direction" is a contextual menu, and often changes to another type.)
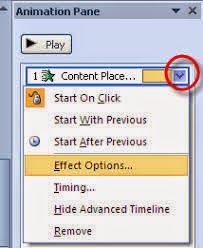
The Start menu allows you to control the timing of the animation. The three choices are:
- On Click: During the slide show, user have to click the mouse button (or hit the right-arrow key) in order to make the animation go.
- With Previous: This makes the animation happen at the exact same time as the previous animation. If there is not previous animation, then the animation will start automatically when the slide appears. User can have a "with previous" animation happen with any animation on any object.
- After Previous: This makes the animation start automatically after the previous animation, not at the same time. In other words, the second animation waits.
3. THE TRANSITIONS TO THE SLIDE GROUP
Slide transitions are the animation-like effects that occur in Slide Show view when you move from one slide to the next during an on-screen presentation. You can control the speed of each slide transition effect, and you can also add sound.
No transition , Blinds Horizontal Blinds Vertical Box In Box Out
Checkerboard Across Checkerboard Down Comb Horizontal Comb Vertical
User can -Add the same slide transition to all of the slides in the presentation .
-Add different slide transition to different of the slides in the presentation.
-Add Sounds to slide transitions .
5.. SLIDE SHOW TAB

1. THE START SLIDE SHOW GROUP
- From Beginning: the slide show begins on slide 1.
- From Current Slide: the normal setting: the slide show begins from the slide you are currently looking at.
- Custom Slide Show: this allows you to choose which slides will be shown and which ones will not. This is in case you give a slide show, but you don't need all the slides.
This section allows you to use some special features for the slide show :
2. SET UP GROUP
SET UP SLIDE SHOW-

Here, user will get several useful options:
- Show Type: To allow user to allow the show to appear full-screen, or in a window.
- Show Slides: Set up a custom show, choosing only a range of slides (e.g., 4-9), or selected slides (e.g., 3-5-9-12-13-16).
- Show Options: User can set the show up so that it repeats instead of ending, or turn off narration or animations.
- Multiple Monitors: If user have more than one monitor--for example, the computer shows one screen on your notebook computer, and a different screen on a TV set, user can control which screen has the slide show and which screen has your notes.
- Performance: Increase the graphics performance, or choose a "resolution" (screen size) for the slides.
HIDE SLIDE -
If there is a slide that user need in your presentation, but do not want it to appear in the slide show, they can hide the slide.
This is particularly useful when one has added slides to a presentation that provide different levels of detail on the subject matter, perhaps for different audiences.
User can mark these slides as hidden so that they are not displayed in your main slide show, but can still access them if need to.
For example, a member of the audience might ask to explain an item in more detail. In that case, one can reveal the hidden slides that contain those details.
However, if time is short and the audience is comprehending the concepts that you are delivering, one may want to keep the slides with the supplementary information hidden so as to continue the presentation without visibly skipping over slides.
RECORD NARRATION -
If the computer has a microphone, user can record a narration.
This will allow user to record a part of the show, so the presentation can play without user.
For example, you could give the PowerPoint file to a friend, and when they play it on your computer, your voice plays as audio and "give the presentation" for you. This can be used with automatic timings of animations and transitions.
REHEARSE TIMINGS -
This option is to rehearse a presentation to make sure that it fits within a certain time frame. While to rehearse, the Slide Timing feature is used to record the time that you need to present each slide, and then use the recorded times to advance the slides automatically when to give the presentation to the actual audience.
3. MONITORS
This area is similar to the "Set Up Slide Show" dialog box; user can:
This area is similar to the "Set Up Slide Show" dialog box; user can:
- Resolution: To choose the screen size. A "higher" (or "bigger") number will mean the slide will seem bigger and have more detail, but might show more slowly. 640x480 is about the same quality as an ordinary TV. 1024x640 is closer to the "720p" type of Hi-Vision (HDTV) television. 1600x1000 is closest to the "1080i" or "1080p" type of HDTV.
- Show Presentation On: If user have more than one screen (e.g., notebook and TV) you can choose which screen will show the slide show full-screen.
- Use Presenter View: In "Presenter View," one screen (usually the TV or projector) will show the slides full-screen, while the other screen (the presenter's notebook screen) will show a special view including notes, as well as the previous and next slides.
6.. REVIEW TAB
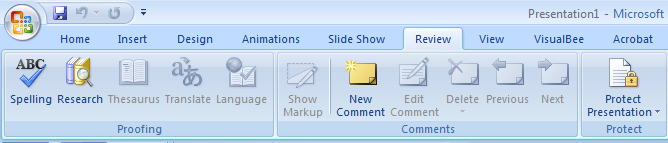
1. PROOFING
- Spelling: perform a spell-check on your writing
- Research: look up any word in a dictionary, theseaurus, or encyclopedia.
- Thesaurus: look up synonyms for any word.
- Translate: look up translations for any word, in several different languages (including Japanese).
- Language: mark selected text as belonging to a certain language; this will allow for spell checking in that language.
2.COMMENTS
SHOW MARKUP-
A comment is a note that you can attach to a letter or word on a slide, or to a whole slide. Use comments when you want people to review and provide feedback on a presentation that you created, or when colleagues ask for your feedback on a presentation.
ADD COMMENT -
On the slide that to add a comment to, do one of the following:- To add a comment about text or an object on a slide, select the text or object.
- To add a general comment about a slide, click anywhere on the slide.
EDIT COMMENT -
Presentation reviewers can edit comments added by other reviewers, which changes the color of the review comment thumbnail and changes the initials to those of the current reviewer.- Click the comment that you want to delete.
- On the Review tab, in the Comments group, click Delete.
Move between review comments-
- To move between comments, on the Review tab, in the Comments group, click Previous or Next.
3.PROTECT
This is to restrict permission to content in a file and prevent it from copying .
For this option user need to have Microsoft Office for Mac Standard 2011.
Information Rights Management (IRM) allows authors to restrict permission for documents, workbooks, and presentations on a per-person or per-group basis. For example, Ranjit, the author, can give Helena permission to read a document but not change it. Ranjit can also give Bobby permission to change the document and allow him to save the document. Authors always have Full Control permission.
IRM provides three permission levels.

